
I don’t know about you, but I always feel my most creative around holidays. No matter the holiday, there is always inspiration for new designs, patterns, and creations.
I feel like my inspiration is doubled this year, because I now have my own little kiddo and I get to fill an Easter basket for him!
You may be familiar with my crochet bunny pattern from absolutely ages ago. I thought it was a fine time to add to that little collection. What more does a bunny love than a crunchy carrot to munch on? So I ran down to my local retailer for the most delicious, fluffy, Premier Parfait yarn from The Knotty Brew and got to work.
This pattern is so quick, relatively simple, and can be added to your little one’s Easter basket in no time! I know I’m sharing this pattern pretty close to the holiday itself, but I’m serious, you can crochet this in an hour or less depending on how fast your fingers are. My fingers are slow these days, and even just designing and troubleshooting the pattern only took me maybe two or three hours total.
Free Crochet Carrot Pattern Instructions
Notes:
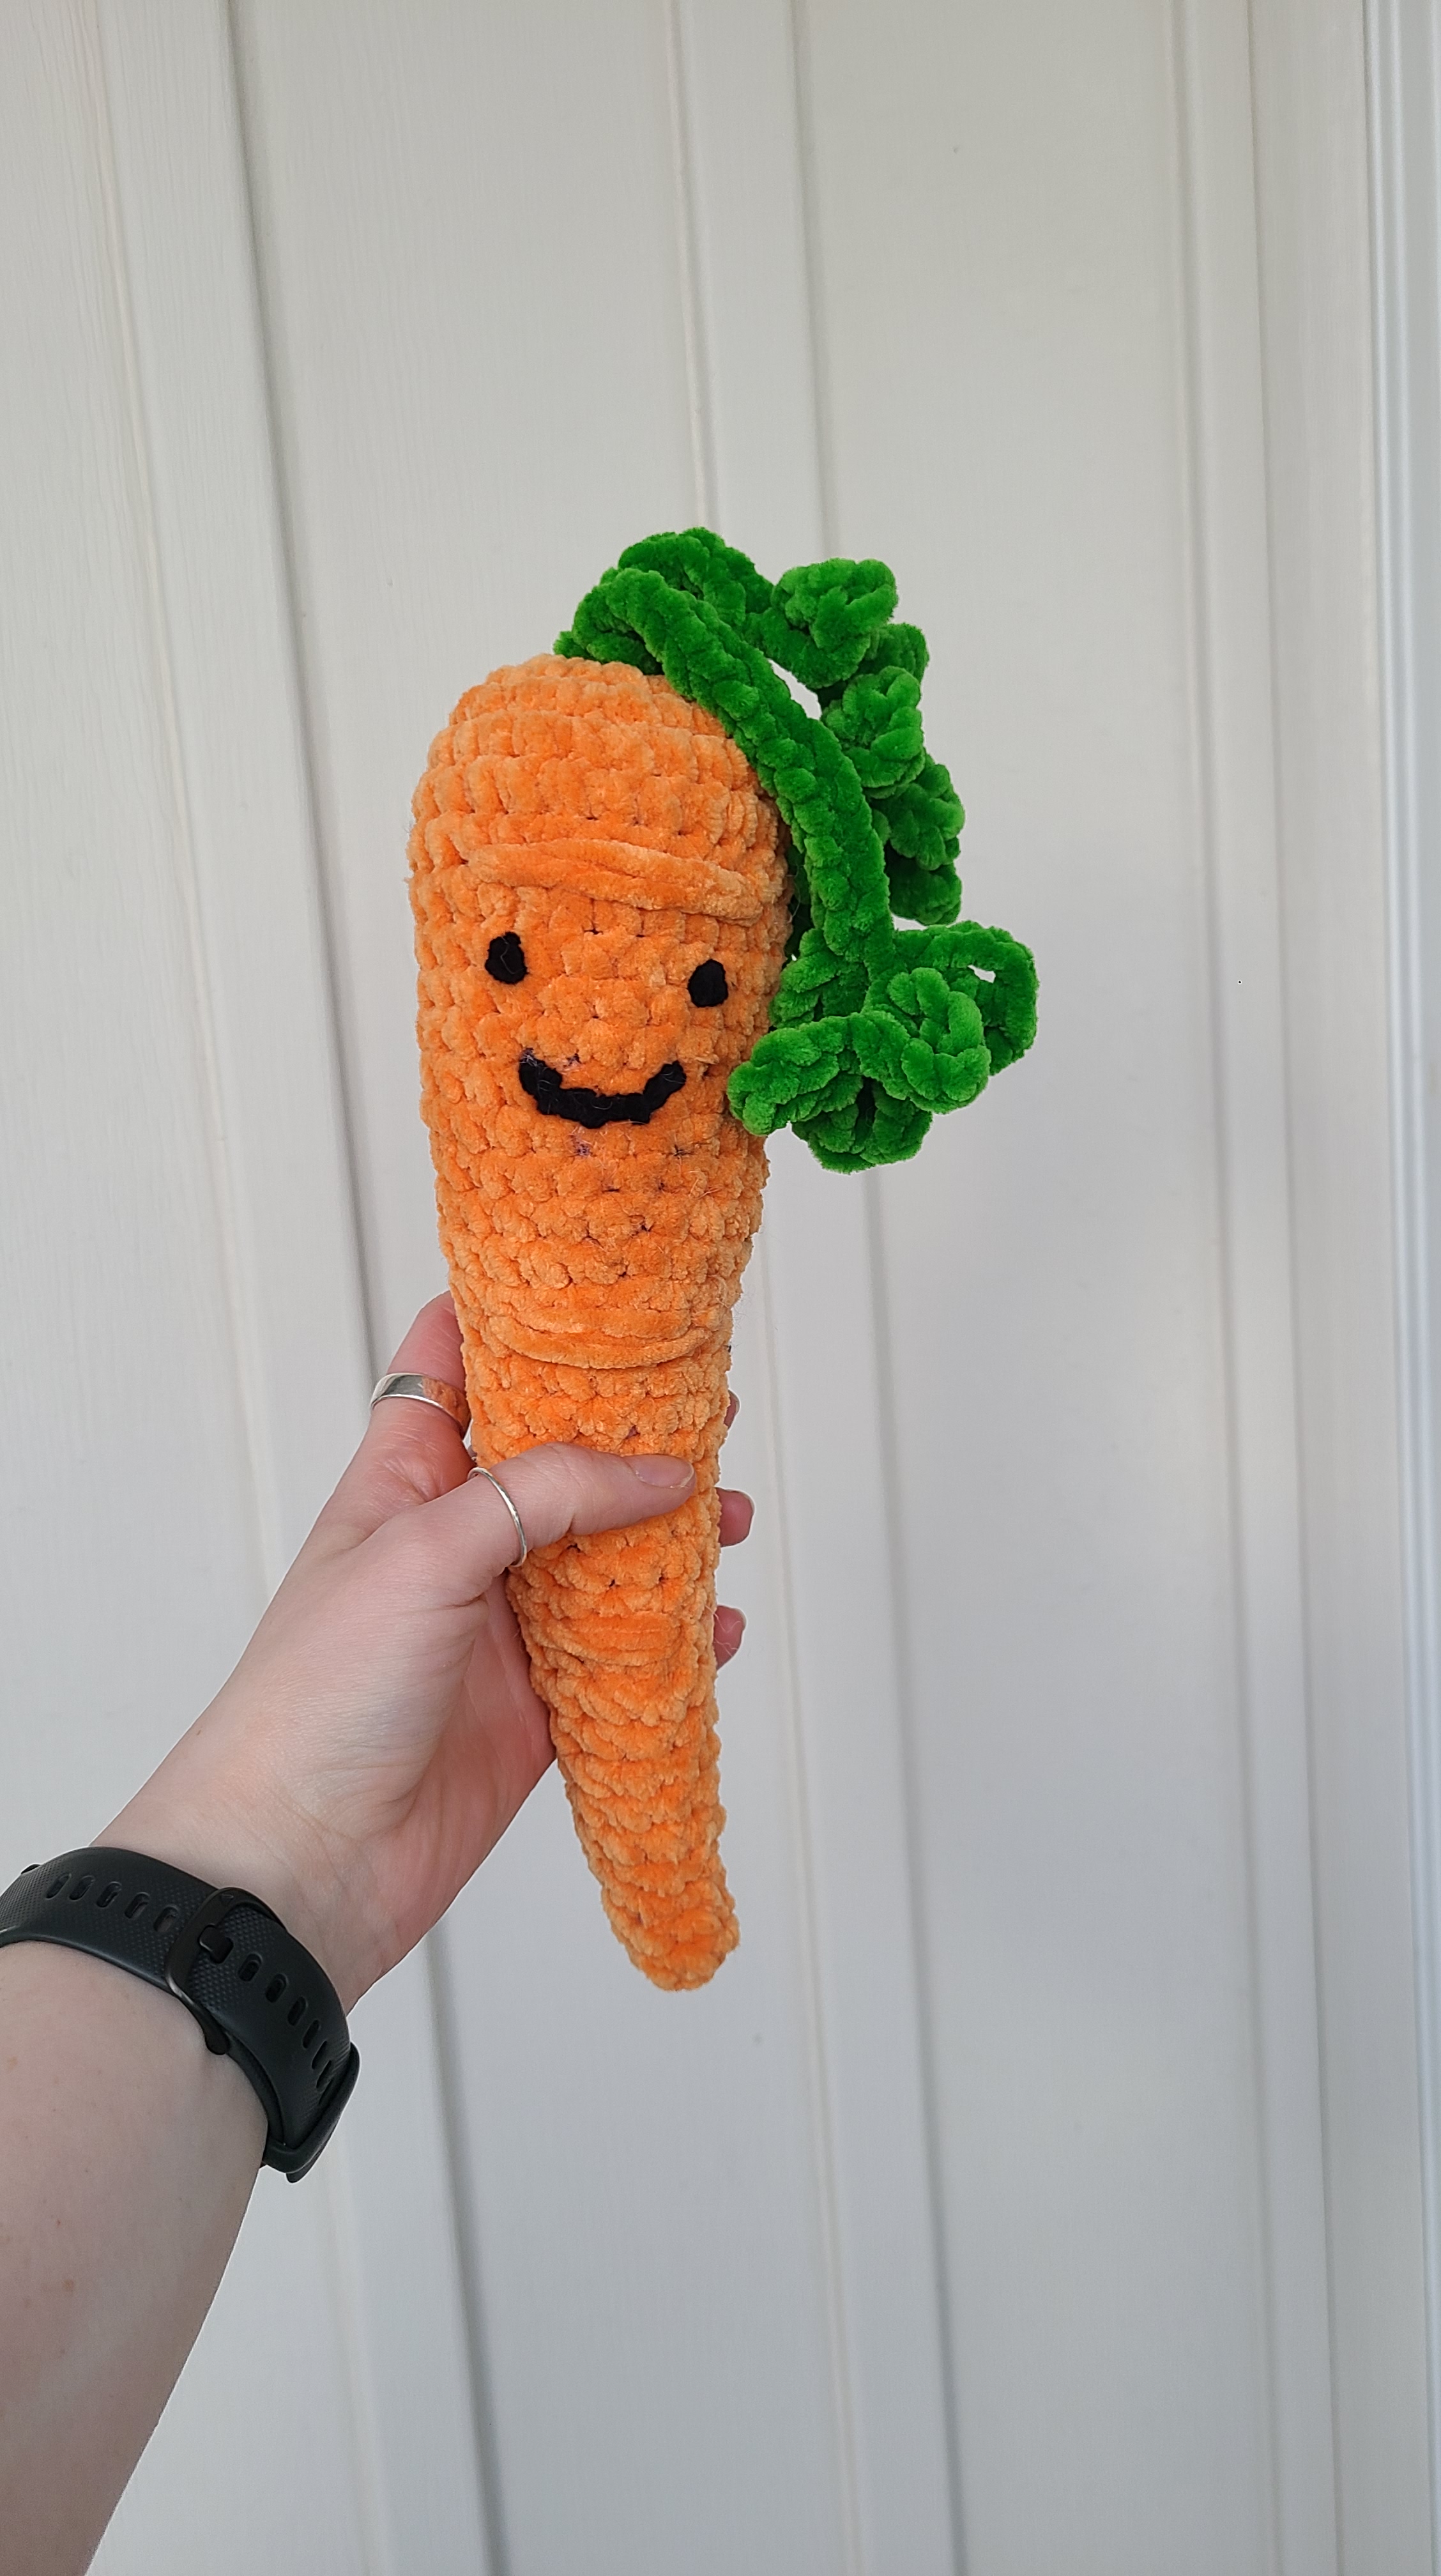
There is no gauge set for this pattern. You can make a larger version simply by using heavier weighted yarn, or a smaller version by using thinner yarn. Make sure you use a crochet hook that is 3-4 mm SMALLER than what the brand of yarn recommends on the label. This helps ensure your stitches are nice and tight, so none of the stuffing is visible through the stitches. The carrot I made using Premier Parfait Chunky, a Super Bulky (6) yarn with a size 5.50mm/I-9 crochet hook ended up being 10 inches long of just carrot, 15 inches long including the leaves, and 9 inches around at the widest part of the carrot.
Everyone has their preferred way to use a lockable stitch marker. What makes the most sense to me is at the beginning of each round, I complete my first stitch and then put the stitch marker into that completed stitch. It should be the stitch directly to the right of your hook. Then when I work my way around I know that once I reach the marker, that will be the first stitch of my next round.
If you are making this for a child that is 3 years of age or younger, please consider embroidering the face! Safety eyes are a choking hazard, and are not always guaranteed to stay within your plushy creation, especially if the toy is going to be loved and played with in the way that kids tend to do…. roughly!
Materials Needed:
- 30g /40y of orange and 7g/10y of green chenille type yarn (I used Premier Parfait Chunky, Super Bulky (6))
- 5.50 mm/I-9 crochet hook, or any hook that is 3-4 mm smaller than the suggested size on the brand label of yarn you choose
- Lockable stitch marker
- Small amount of black yarn for face if choosing to embroider
- Safety eyes if choosing not to embroider the eyes
- Yarn needle
- Scissors
- Preferred type of stuffing
Glossary of Stitches
- sl st: slip stitch
- ch: chain
- sc: single crochet
- inc: increase (two single crochets in one stitch)
- dec: decrease (single crochet two together, see tip below)
- yo: yarn over
- tc: triple crochet
Tip for Decreases
Decreases often make a wonky gap in your work if you do them the standard way. I prefer this sneaky trick to keep my decreases tight, and essentially invisible. Insert your hook in the front loop of your next stitch, and without pulling any yarn through, insert the hook again through the front loop of the following stitch (aka the two stitches you want to decrease into one stitch). You will have 3 loops on your hook right now. YO and pull through the first two loops. YO and pull through the two remaining loops. Ta da!
Pattern Instructions
Using orange yarn, tart with a slip knot on your hook and ch 2
Sc 6 in the second chain from your hook (6 stitches)
Inc around (12 stitches)
*Sc 1, inc, repeat around from * (18 stitches)
*Sc 2, inc, repeat around from * (24 stitches)
Sc around for 4 rounds (24 stitches)
*Sc 6, dec, repeat around from * (3 decreased, 21 stitches)
Sc around for 4 rounds (21 stitches)
*Sc 5, dec, repeat around from * (3 decreased, 18 stitches)
Sc around for 4 rounds (18 stitches)
*Sc 4, dec, repeat around from * (3 decreased, 15 stitches)
Sc around for 4 rounds
*Sc 3, dec, repeat around from * (3 decreased, 12 stitches)
I would recommend starting to stuff your carrot now, and add safety eyes or embroider the face if you prefer to do this before the plush is closed! I added my eyes around the first decrease row (around the 8th row of work) and my face in the next section of sc rounds (around the 10th and 11th row of work)
Sc around for 4 rounds
*Sc 2, dec, repeat around from * (3 decreased, 9 stitches)
Sc around for 4 rounds
Add some more stuffing here!
*Sc 1, dec, repeat around from * (3 decreased, 6 stitches)
Squish any remaining stuffing you can into the tip of your carrot to make sure it isn’t all floppy at the end. No one wants a floppy carrot!
Snip your yarn and use a yarn needle to weave through any remaining gaps in the 6 stitches remaining at the end of your carrot to make sure it is closed snuggly. Weave in any ends.
Change to your green yarn and locate on the top of your carrot the first round of inc stitches. Insert your hook into a gap in one of these stitches and pull up a loop, yo and pull through both loops. Your green yarn should now be secured to the top of your carrot
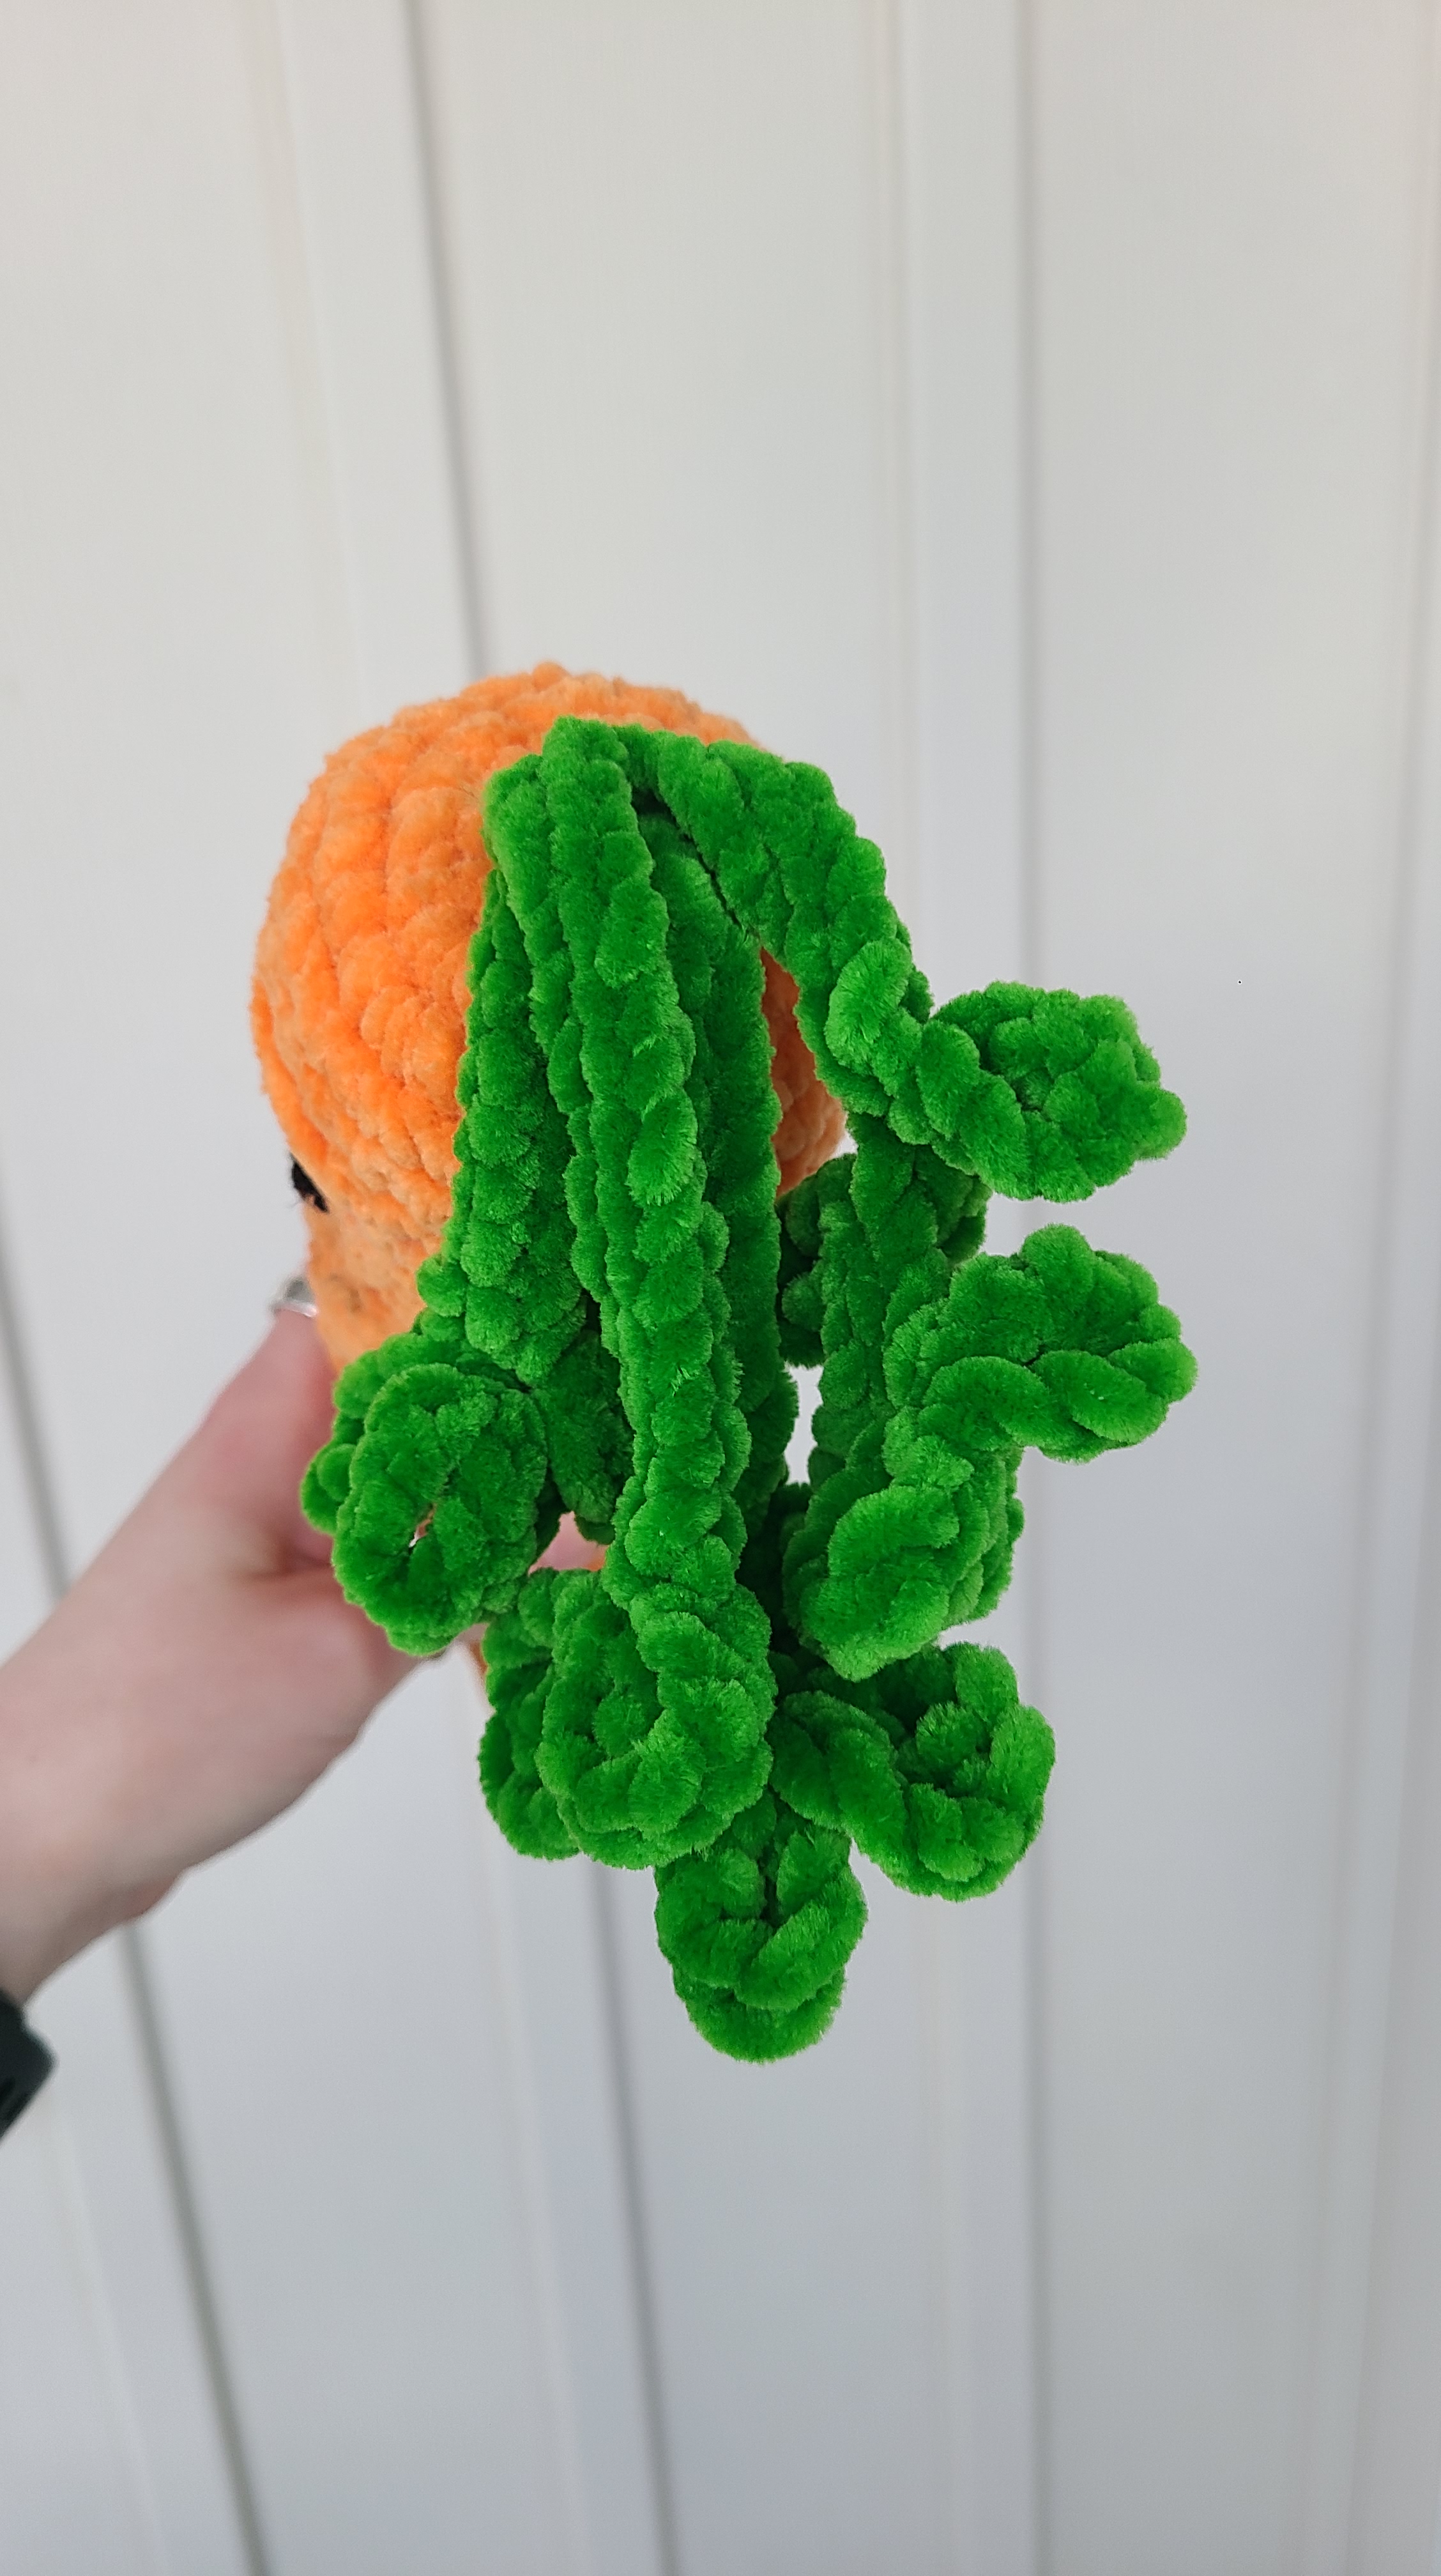
Now you will be making the carrot leaves. Each leaf is a cluster of tc’s surrounded by chain stitches to create little circular shapes. Each leaf has the same section of 4 circular shapes worked into one ch. Two leaves have additional circular shapes worked down the ch to create a fluffier appearance of the carrot leaves altogether
Instructions for Circular Shape: ch 4, tc into 4th ch from hook, ch 4, sl st into same stitch tc was worked into. You should now have one tc stitch “surrounded” by one column of 4 chain stitches on each side
Leaf 1: Ch 14, work 4 circular shapes into the same stitch
Sl st down remaining unworked ch stitches, skip one orange stitch, sc into another gap between two stitches in first inc round of carrot top
Leaf 2: Ch 20, work 4 circular shapes into the same stitch. Sl st down one unworked ch stitch, work one circular shape
Sl st down remaining unworked ch stitches, skip one orange stitch, sc into another gap between two stitches in first inc round of carrot top
Leaf 3: Ch 15, work 4 circular shapes into the same stitch
Sl st down remaining unworked ch stitches, skip one orange stitch, sc into another gap between two stitches in first inc round of carrot top
Leaf 4: Ch 23, work 4 circular shapes into the same stitch. Sl st down one unworked ch stitch, work 2 circular shapes into the same sl st. sl st down one more unworked ch stitch, work 1 circular shape
Sl st down remaining unworked ch stitches, skip one orange stitch, sc into another gap between two stitches in first inc round of carrot top, sl st into the side of the first green stitch you used to start the round
Cut your yarn and weave in your ends.
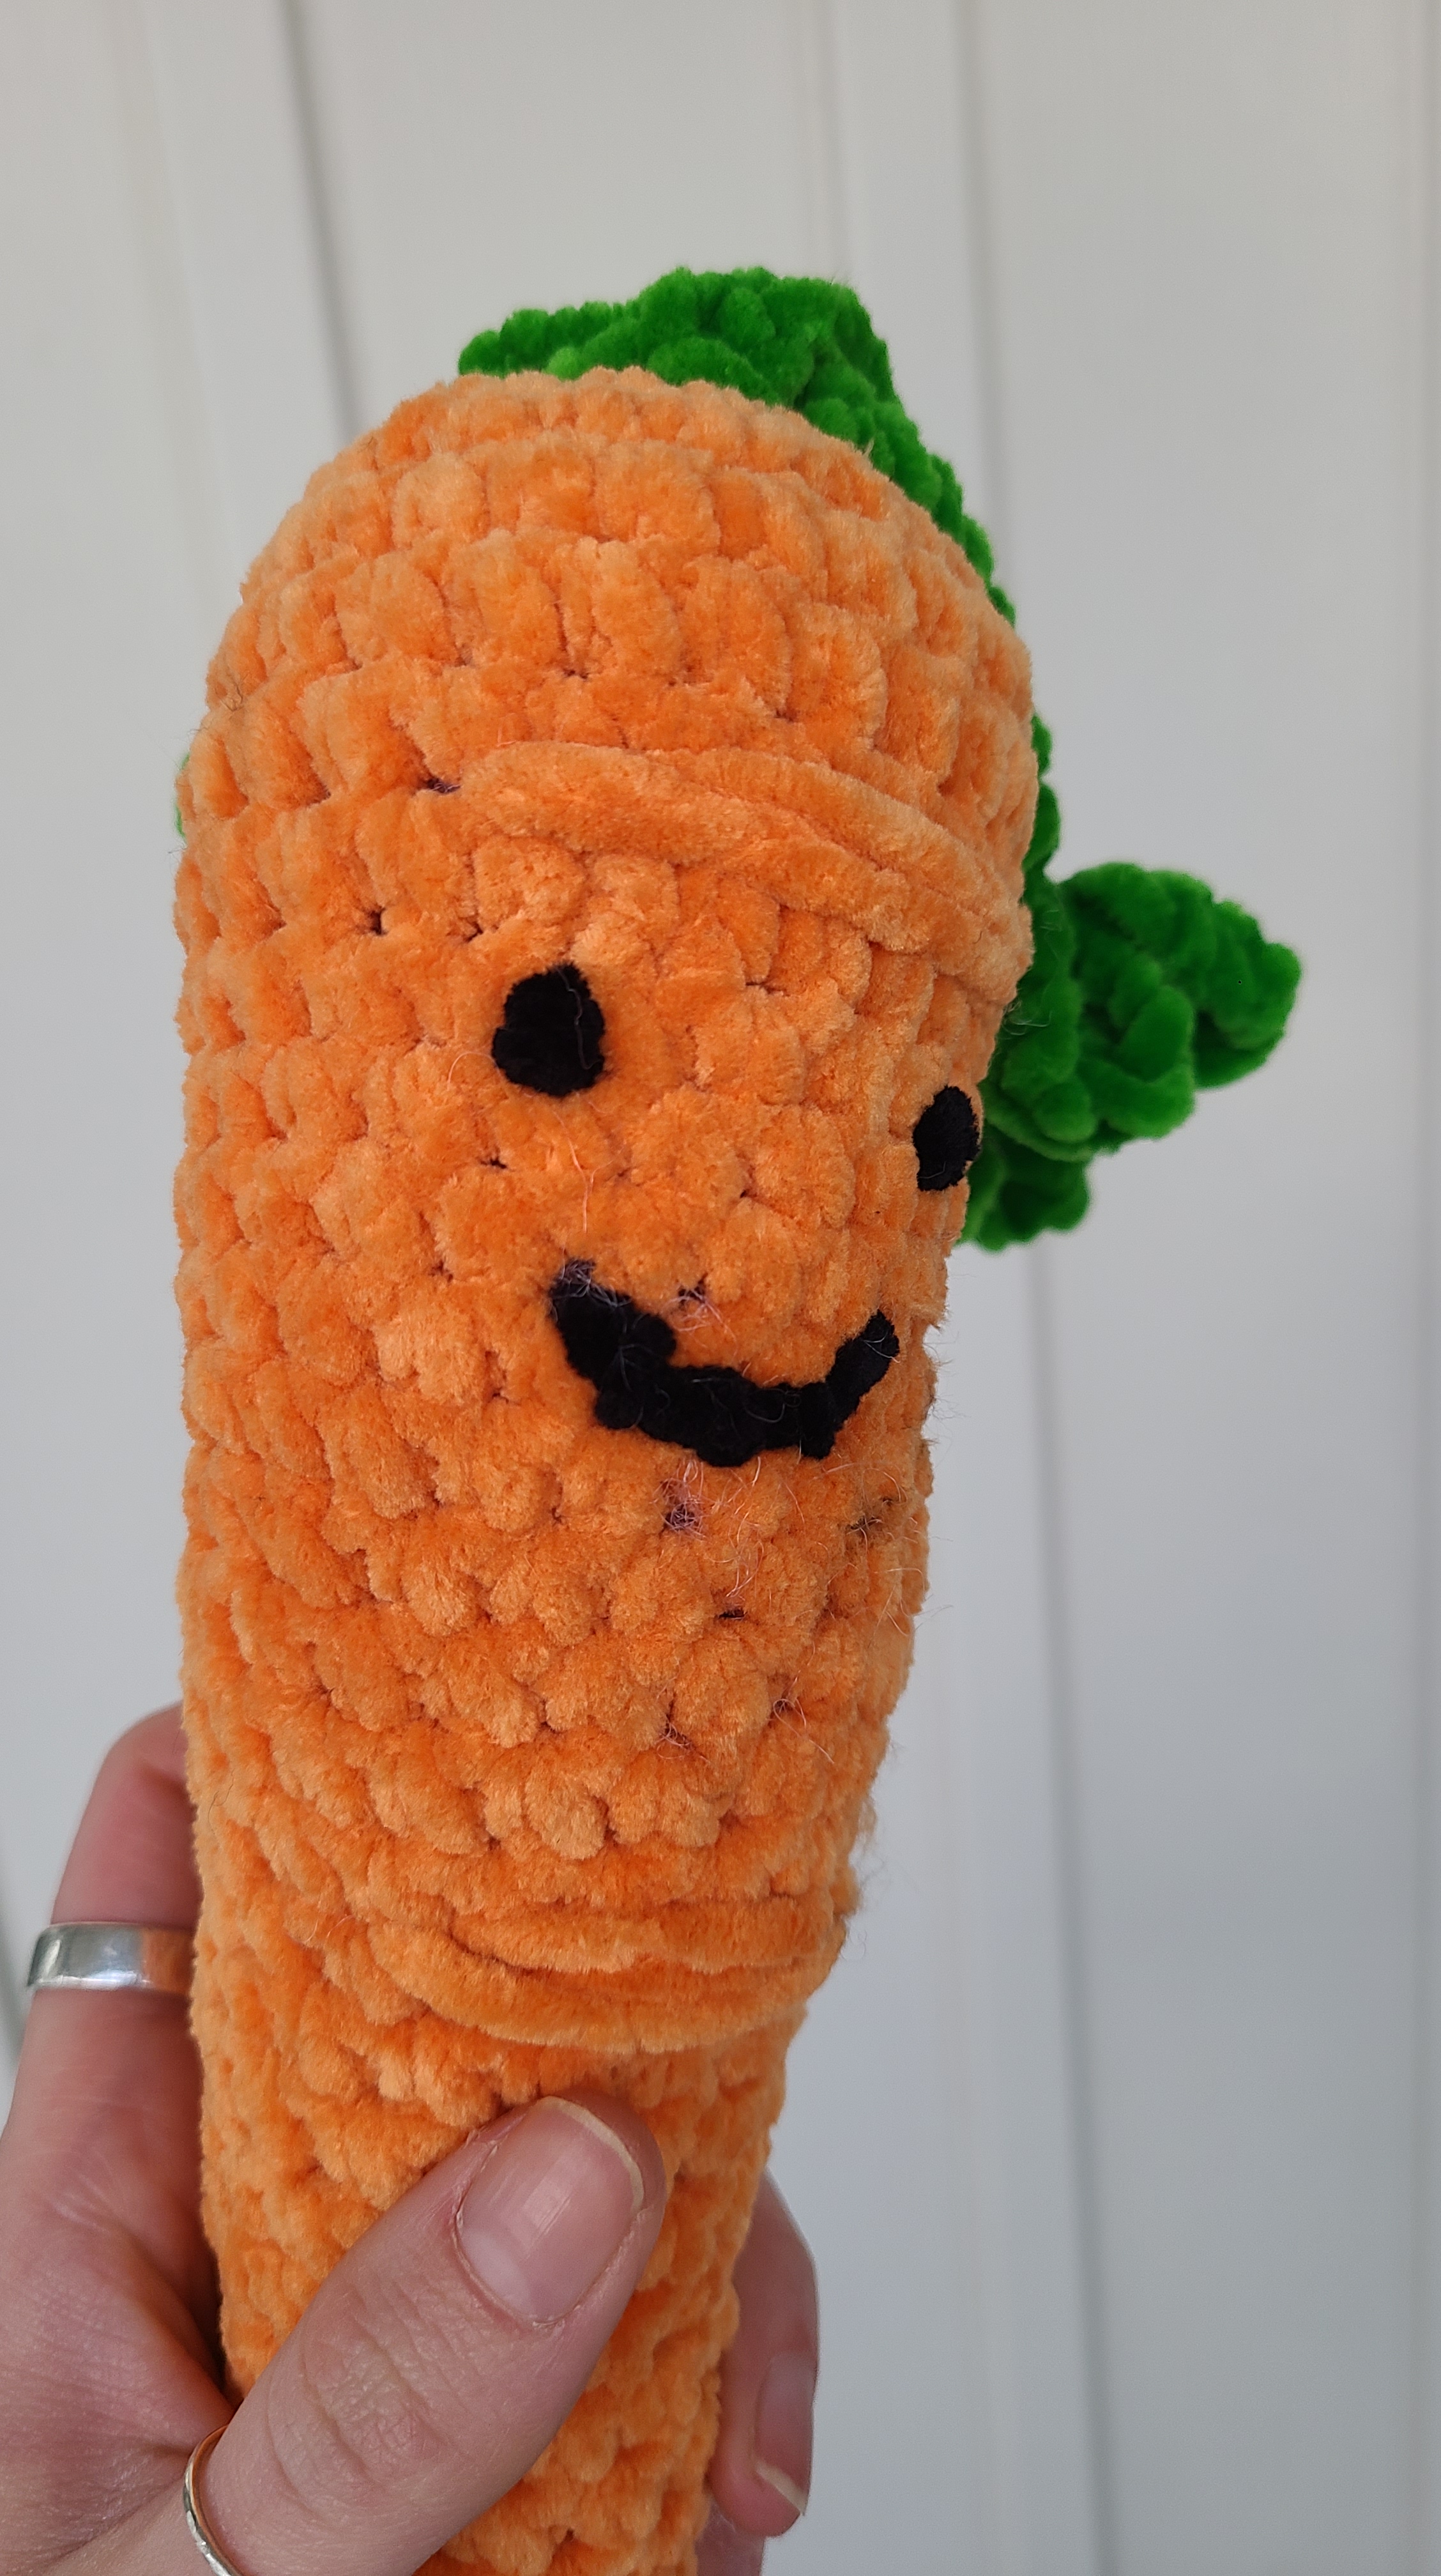
If you haven’t yet embroidered eyes and a smile, please do so now! I worked my eyes around the 8th round and the smile over the 10th and 11th rounds roughly. Use your preferred method. I am still learning the best method for this, so I unfortunately don’t have many tips. For the smile, I followed suggestions from this video here.
Optionally you can also add some horizontal decorative lines to your carrot by weaving two strands of your orange yarn across about half the width of your carrot. I did three lines down the length of my carrot, equally spaced apart.
What are these lines even called? Beats me. I feel like carrots often have delicate horizontal ribbing to them and I thought it was a cute touch.
You now have the cutest and cuddliest carrot ever!
As always, I am completely fine with people choosing to sell finished items using my patterns. I do ask that you please credit me as the designer of the pattern if you choose to share your images online.
Happy crocheting, and Happy Easter!
Another note: Because this is a free pattern, the level of detail is less involved than you would expect to see in my paid patterns. I hope to take additional images of the carrot leaves section to increase clarity of instruction, but for now I am happy to try and answer questions via comments or email if you are stuck! You can reach me at stringsandthings16@gmail.com
